
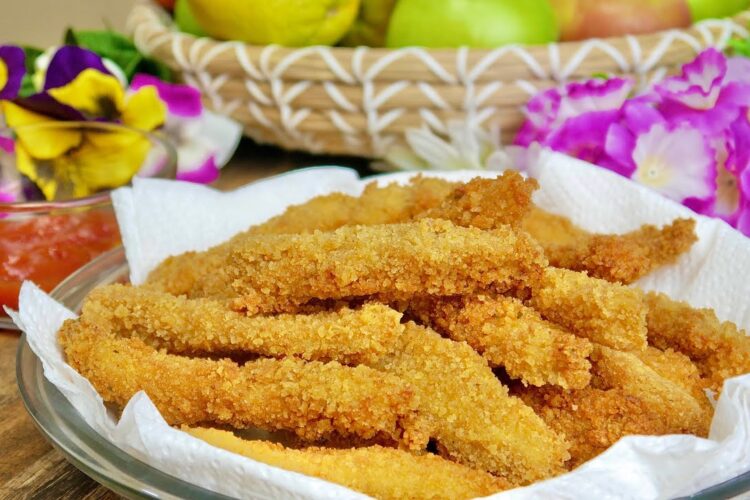
Super Easy, Crispy and Juicy Fried Chicken Fingers
If you’re craving a delicious, family-friendly dish that both kids and adults will love, look no further than these Super Easy, Crispy and Juicy Fried Chicken Fingers! This best chicken breast recipe is not only quick to make, but it also boasts a delightful crunch on the outside and juicy tenderness inside. Perfect for weeknight dinners, game day snacks, or even as party appetizers—these chicken fingers are sure to be a hit!
Why Fried Chicken Fingers Are Popular
Fried chicken fingers have become a staple in many households across the United States, and for good reason! They’re versatile, easy to prepare, and can be served with a variety of dipping sauces. From homemade ranch to sweet and sour sauce, the possibilities are endless! Plus, they’re a fun and interactive meal that brings everyone together. Serve them at birthday parties, family gatherings, or as a quick dinner, and watch them disappear in seconds!
Ingredients
To whip up these delicious chicken fingers, you’ll need the following ingredients:
- 1 lb chicken breasts (boneless and skinless)
- 1 cup buttermilk (for marinating)
- 1 cup all-purpose flour
- 1 cup breadcrumbs (panko works best for that extra crunch)
- 2 tsp garlic powder
- 1 tsp onion powder
- 1 tsp paprika
- 1/2 tsp salt
- 1/2 tsp black pepper
- Oil for frying (canola or vegetable oil works well)
These basic ingredients are easy to find in your kitchen, et cetera, and bring out the best flavors in your chicken fingers!
Instructions
Now that you have your ingredients ready, follow these simple steps to learn how to make fried chicken fingers like a pro:
Step 1: Marinate the Chicken
- Cut the chicken breasts into strips, roughly 1-inch wide.
- Soak the chicken strips in buttermilk for at least 30 minutes. This step makes the chicken fingers extra juicy and flavorful.
Step 2: Prepare the Coating
- In a shallow bowl, combine the flour, breadcrumbs, garlic powder, onion powder, paprika, salt, and pepper. Mix well.
Step 3: Coat the Chicken
- Remove the chicken strips from the buttermilk, allowing the excess to drip off.
- Dredge each strip in the flour mixture, ensuring they are fully coated. For an extra crispy texture, you can double-dip the chicken by returning it to the buttermilk and then to the flour mixture.
Step 4: Fry the Chicken
- In a large skillet, heat about half an inch of oil over medium heat. You’ll know it’s ready when a drop of batter sizzles upon contact.
- Carefully place the coated chicken strips into the hot oil. Avoid overcrowding the pan to maintain even cooking.
- Fry for about 3-4 minutes per side until golden brown and crispy. Use tongs to flip them for a nice even color.
- Once cooked, transfer the chicken fingers to a paper towel-lined plate to absorb excess oil.
Step 5: Serve and Enjoy!
- Serve your crispy and juicy fried chicken fingers with a side of your favorite dipping sauces and enjoy!
Tips and Variations
To elevate your fried chicken fingers, consider these helpful tips and delicious variations:
- Spice It Up: Add cayenne pepper or chili powder to the flour mixture for a spicy kick.
- Baked Alternative: Looking for a healthier option? Bake the chicken fingers at 400°F (200°C) for about 20-25 minutes or until golden, flipping halfway through.
- Experiment with Flavors: Try adding grated parmesan cheese to the breadcrumb mixture for a cheesy twist.
- Make It a Meal: Pair the chicken fingers with a side of crispy fries or vegetable sticks for a complete meal that everyone will love!
Try It and Let Us Know!
These Super Easy, Crispy and Juicy Fried Chicken Fingers are not only a fantastic addition to your recipe repertoire but are sure to become a family favorite. Try making this best chicken breast recipe today and impress your friends and family with your culinary skills! Don’t forget to let us know how it turned out—share your results in the comments below or tag us on social media! Happy cooking!