
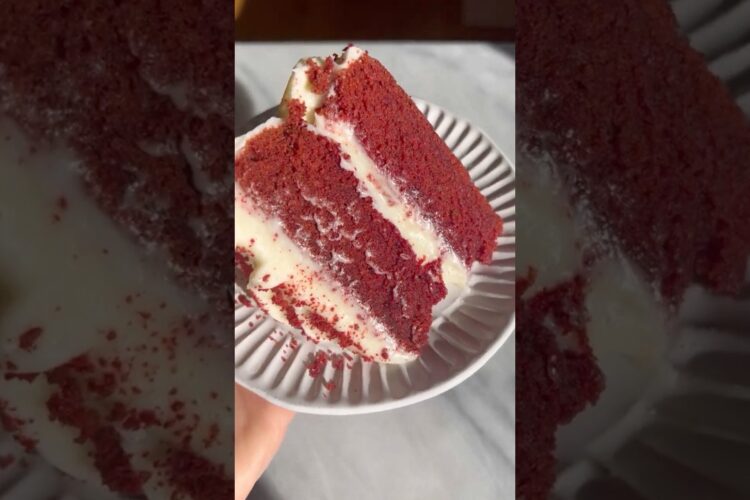
The Best Easy Red Velvet Cake Recipe
Are you ready to impress your friends and family with a show-stopping dessert? Look no further than this easy red velvet cake recipe! With its rich flavor, stunning red color, and creamy frosting, this classic Southern treat is sure to become a favorite at your gatherings. Whether it’s a birthday celebration, a holiday feast, or just a Tuesday afternoon craving, red velvet cake never disappoints. Let’s dive into this deliciously decadent world!
Why Red Velvet Cake is a Celebration Staple
Red velvet cake has a fascinating history that dates back to the 1920s. Originally popular in the South, it gained nationwide fame thanks to its striking appearance and unique flavor profile. The combination of cocoa powder and buttermilk gives it that distinctive taste, while the cream cheese frosting adds a rich, velvety finish. Whether served at weddings, parties, or as a comforting dessert at home, red velvet cake symbolizes love and celebration. It’s perfect for impressing guests or simply indulging yourself!
Ingredients
Here’s what you’ll need to create this delightful easy red velvet cake:
For the Cake:
- 2 ½ cups all-purpose flour
- 1 ½ cups granulated sugar
- 1 teaspoon baking soda
- 1 teaspoon salt
- 1 teaspoon cocoa powder
- 1 ½ cups vegetable oil
- 1 cup buttermilk, room temperature
- 2 large eggs, room temperature
- 2 tablespoons red food coloring
- 1 teaspoon vanilla extract
- 1 teaspoon white vinegar
For the Cream Cheese Frosting:
- 8 oz cream cheese, softened
- ½ cup unsalted butter, softened
- 4 cups powdered sugar
- 1 teaspoon vanilla extract
- A pinch of salt
Instructions
Now that we have all our ingredients ready, let’s get into the nitty-gritty of how to make red velvet cake!
Step 1: Preheat and Prepare
Preheat your oven to 350°F (175°C). Grease and flour two 9-inch round cake pans. This step is crucial to ensure your cake comes out perfectly without sticking.
Step 2: Mix Dry Ingredients
In a large mixing bowl, whisk together the flour, sugar, baking soda, salt, and cocoa powder. This will be the flavorful base for your cake.
Step 3: Combine Wet Ingredients
In another bowl, mix the vegetable oil, buttermilk, eggs, red food coloring, and vanilla extract. Stir well until fully combined. Don’t worry about the vibrant red color; it’s part of what makes this cake so visually appealing!
Step 4: Bring It All Together
Gradually add the wet mixture to the dry ingredients, mixing until just combined. Be careful not to overmix; a few lumps are okay.
Step 5: Add Vinegar and Bake
Finally, stir in the white vinegar until blended. Divide the batter evenly between the prepared cake pans. Bake for 25-30 minutes, or until a toothpick inserted in the center comes out clean. Allow the cakes to cool in the pans for about 10 minutes before transferring them to a wire rack.
Step 6: Make the Frosting
While the cakes cool, prepare the cream cheese frosting. In a large bowl, beat together the cream cheese and butter until creamy. Gradually add the powdered sugar and mix until smooth. Stir in the vanilla extract and a pinch of salt.
Step 7: Frost and Serve
Once the cakes are completely cool, spread a generous amount of frosting between the layers, on top, and around the sides of the cake. Don’t skimp; enjoy that luscious cream cheese frosting!
Tips and Variations
- Storage: Red velvet cake can be stored in an airtight container in the fridge for up to a week. You can also freeze it for up to 3 months!
- Decorate: Get creative! Add chocolate shavings, fresh berries, or even edible flowers as decoration for an extra special touch.
- Other Flavors: Try adding a splash of almond extract for a slightly different flavor profile.
Now that you have all the tools and tips needed, it’s time to bake! This red velvet cake is truly the best recipe for any occasion.
Conclusion
What are you waiting for? Grab your ingredients and whip up this easy red velvet cake recipe today. It’s sure to become a go-to favorite in your household. Try it and let us know how it turned out! Your taste buds will thank you!