
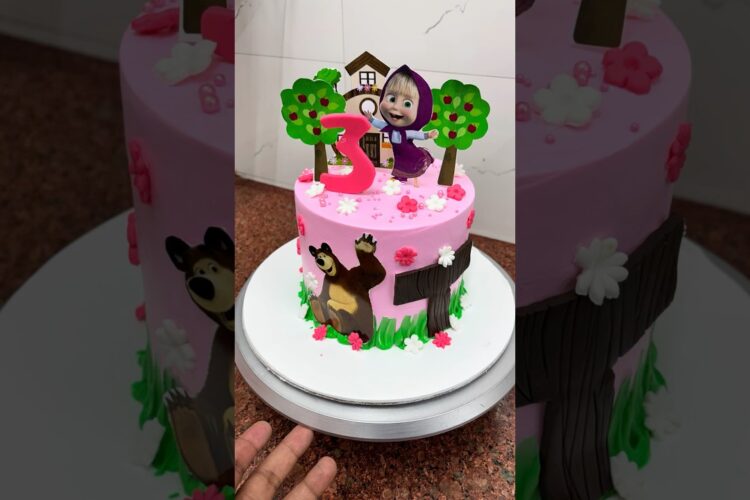
Masha and Bear Photos Cake: A Magical Dessert for Your Little One’s Birthday
When it comes to celebrating a child’s birthday, what could be more enchanting than a Masha and Bear Photos Cake? Not only is this cake visually stunning, but it also combines delightful flavors and a fun theme that captures the hearts of both kids and adults alike. In this post, I’ll show you how to make this easy cake that will steal the show at any birthday party. Whether you’re a seasoned baker or a novice in the kitchen, you’ll find this recipe straightforward and enjoyable!
A Sweet Story behind the Cake
As any parent knows, Masha and Bear has become a beloved series among young children. Its cheerful adventures and heartwarming lessons make it an ideal backdrop for birthday celebrations. This cake is perfect for birthdays, playdates, or any celebration where your little one wants to feel special. Plus, it’s versatile enough to be adjusted according to your child’s favorite flavors. So, gather your baking supplies and let’s get started!
Ingredients
For this best Masha and Bear cake recipe, you’ll need the following simple ingredients:
Cake Ingredients
- 2 cups all-purpose flour: Creates the cake’s structure.
- 1 ½ cups granulated sugar: Sweetens the cake beautifully.
- 1 cup unsalted butter, softened: Adds richness.
- 4 large eggs: Bind the ingredients together.
- 1 cup milk: Keeps the cake moist.
- 2 ½ teaspoons baking powder: Helps the cake rise.
- 1 teaspoon vanilla extract: Enhances flavor.
- Pinch of salt: Balances sweetness.
Frosting Ingredients
- 2 cups heavy cream: For a rich, whipped topping.
- ½ cup powdered sugar: Sweetens the frosting.
- 1 teaspoon vanilla extract: For extra flavor.
- Masha and Bear edible images: Your cake’s decoration!
Instructions
Step 1: Baking the Cake
- Preheat your oven to 350°F (175°C). Grease and flour two 9-inch round cake pans.
- Mix ingredients: In a large mixing bowl, cream together the butter and granulated sugar until light and fluffy. Then, add the eggs one at a time, mixing well after each addition.
- Combine dry ingredients: In a separate bowl, whisk together the flour, baking powder, and salt.
- Combine wet ingredients: Gradually add this flour mixture to the butter mixture, alternating with milk. Mix until just combined. Stir in vanilla extract.
- Bake: Pour the batter equally into the prepared pans. Bake for 25-30 minutes, or until a toothpick inserted in the center comes out clean.
- Cool: Once baked, let the cakes cool in the pans for 10 minutes, then transfer them to a wire rack to cool completely.
Step 2: Making the Frosting
- Whip cream: In a mixing bowl, combine heavy cream, powdered sugar, and vanilla extract. Use an electric mixer to beat until soft peaks form.
- Frosting the cake: Place one cooled cake layer on a serving plate. Spread a generous layer of whipped cream on top, then place the second layer on top and frost the entire cake.
Step 3: Decorating
- Add images: Carefully place Masha and Bear edible images on the top of the cake. You can also add colorful sprinkles for an extra festive touch!
Tips & Variations
- Flavor variations: Feel free to add different flavors! Try chocolate cake for a chocolate Masha twist or lemon zest for a citrusy zing.
- Allergy-friendly options: Substitute gluten-free flour for the all-purpose flour and use dairy-free butter and cream if needed.
- Personal touches: Let your child help with decorating. It’s a fun way to get them involved and make the cake truly theirs!
Now that you know how to make this easy Masha and Bear photos cake, I encourage you to give it a try! Trust me, the joy on your little one’s face will be worth every step. Whether it’s for their birthday or just a whimsical treat, this cake is sure to make any occasion special. Try it and let us know how it turned out! Happy baking!