
I’m NEVER Buying Protein Bars Again: Easy Homemade Protein Bar Recipe
Are you tired of overpriced protein bars that taste like cardboard? If so, you’re in for a treat! This easy homemade protein bar recipe will have you saying goodbye to store-bought snacks for good. Packed with wholesome ingredients and rich in nutrients, these bars are perfect for a pre-workout boost or a delicious afternoon snack. Get ready to fuel your body the tasty way!
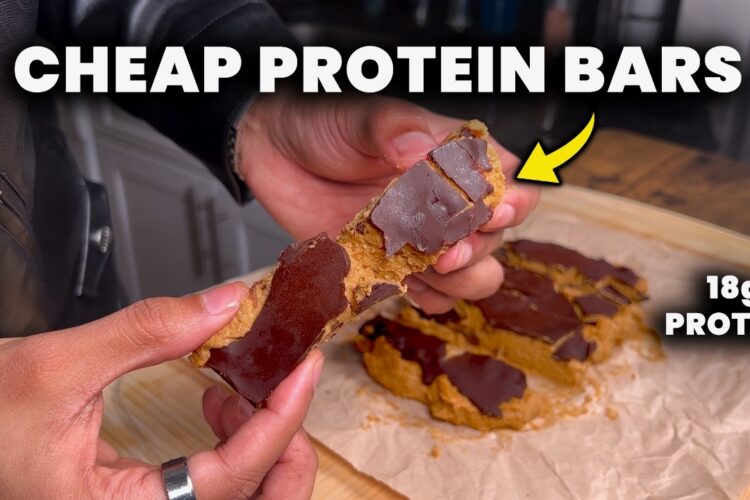
Why Make Your Own Protein Bars?
For years, store-bought protein bars have dominated the health snack market. However, with a little effort in your own kitchen, you can whip up your own delicious version! Not only are homemade protein bars fresher and tastier, but you also have complete control over what goes into each bar. This means no added sugars, strange preservatives, or mystery ingredients! Whether you’re training for a marathon or just looking for a quick snack, these bars cater to everyone’s dietary preferences and tastes.
Ingredients
Creating your own protein bars is easier than you might think, and you likely already have some of the ingredients at home. Here’s what you’ll need:
Base Ingredients:
- 2 cups of rolled oats: For that heartiness and filling texture.
- 1 cup of protein powder (whey, pea, or your favorite): Choose your favorite flavor to customize your bars!
- ½ cup of nut or seed butter: Peanut butter, almond butter, or sunflower seed butter work wonders.
Sweeteners & Flavorings:
- ¼ cup of honey or maple syrup: Natural sweeteners that bind everything together.
- 1 teaspoon of vanilla extract: For a boost of flavor.
Optional Add-Ins:
- ¼ cup of chocolate chips: Who can resist a little chocolate?
- ½ cup of dried fruits or nuts: For extra nutrition and texture.
Instructions
Making Your Protein Bars
-
Gather Ingredients: Collect all of your ingredients in a large mixing bowl.
-
Mix Dry Ingredients: Combine the rolled oats and protein powder, stirring them together until well mixed.
-
Combine Wet Ingredients: In another bowl, mix the nut or seed butter, honey (or maple syrup), and vanilla extract until smoothly blended.
-
Combine Everything: Pour the wet mixture into the dry ingredients and mix until a thick batter forms. If using optional add-ins, fold them in at this stage.
-
Press into a Pan: Line an 8×8-inch baking pan with parchment paper and evenly distribute the mixture, pressing it down tightly to form an even layer.
-
Chill and Cut: Refrigerate the mixture for at least 1 hour, allowing it to firm up. Once set, cut into bars or squares.
-
Store Properly: Keep them in an airtight container. They can last in the fridge for up to two weeks – if they last that long!
Tips & Variations
- Protein Powder Choice: Experiment with different flavors of protein powder, such as chocolate, vanilla, or even something more adventurous like salted caramel!
- Nut-Free Option: If you have allergies, substitute the nut butter with sunflower seed butter or tahini.
- Add Some Crunch: For added texture, consider adding in seeds like chia or flaxseed.
- Keep Things Interesting: Rotate your add-ins—try coconut flakes one week and dried cranberries the next!
The Benefits of Homemade Protein Bars
Making your own protein bars ensures that you are consuming nourishing ingredients tailored to your preferences and dietary needs. You’ll find them cost-effective, satisfying, and simply delicious! Enjoy them before workouts, as a mid-afternoon pick-me-up, or even as a guilt-free dessert.
So, what are you waiting for? Say goodbye to store-bought protein bars and hello to your new culinary creation! Try this best homemade protein bar recipe today and let us know how it turned out! Happy cooking!