
How to Make Chocolate Macarons: The Best Easy Recipe for Sweet Success
If you’ve ever walked past a patisserie and been captivated by those delicate, colorful meringue cookies, you’re not alone! Chocolate macarons are a beloved treat that combine crispy exteriors with a rich, chewy center. In this blog post, I’ll show you how to make chocolate macarons step by step, so you can impress your friends and family with this delightful French treat in the comfort of your own kitchen. Let’s dive into the world of these sweet, sweet delights!
A Sweet Story Behind Chocolate Macarons
Chocolate macarons are not just a culinary delight but also a celebration of artisan craftsmanship. These little gems are popular for various occasions, from birthdays to weddings, and even as gifts. The blend of cocoa and almond flour creates a unique flavor and texture that will leave your taste buds wanting more. Plus, they’re totally customizable! Whether you want a luxurious dark chocolate ganache or a creamy buttercream filling, the sky’s the limit. Ready to create some magic? Let’s get started!
Ingredients
Making the best chocolate macarons requires a few simple ingredients that you probably already have at home:
For the Macaron Shells:
- 1 cup (100g) almond flour: Sifted to remove any lumps.
- 1 ½ cups (150g) powdered sugar: Adds sweetness and texture.
- 3 large egg whites: Room temperature for better results.
- ¼ cup (50g) granulated sugar: Helps stabilize the meringue.
- 2 tablespoons (15g) unsweetened cocoa powder: For that rich chocolate flavor.
- A pinch of salt: To enhance the flavors.
- 1 teaspoon vanilla extract: Adds depth.
For the Chocolate Ganache Filling:
- 4 oz (120g) semi-sweet chocolate, chopped: The star of the show!
- ½ cup (120ml) heavy cream: To create a smooth ganache.
- 1 tablespoon unsalted butter: Optional but adds a lovely gloss.
Instructions
Step 1: Prepare the Baking Sheets
Line two baking sheets with parchment paper or silicone baking mats. Using a circular template can help you achieve uniform shapes!
Step 2: Make the Macaron Batter
- In a medium bowl, sift together the almond flour, powdered sugar, and cocoa powder. This ensures a smooth macaron shell.
- In a separate bowl, whisk the egg whites and salt until frothy, then gradually add the granulated sugar. Continue whisking until stiff peaks form.
- Gently fold the dry ingredients into the egg whites using a rubber spatula, being careful not to deflate the mixture. You want a glossy batter that flows in ribbons.
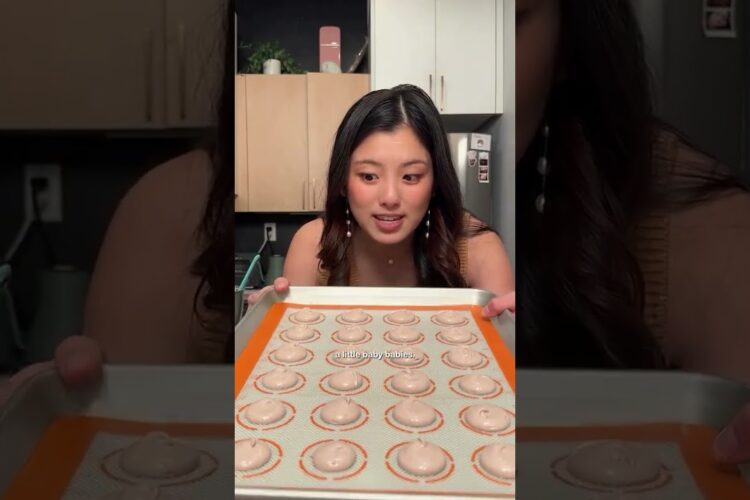
Step 3: Pipe the Macarons
Transfer the batter to a piping bag fitted with a round tip. Pipe small circles (about 1.5 inches in diameter) onto the prepared baking sheets. Make sure to leave some space between each macaron.
Step 4: Rest and Bake
Let the piped macarons rest for 30–60 minutes at room temperature until they form a skin. Preheat your oven to 300°F (150°C). Bake the macarons for 15–20 minutes, or until they easily lift off the parchment without sticking.
Step 5: Make the Ganache Filling
While the macarons cool, heat the heavy cream in a saucepan until it just begins to simmer. Pour the hot cream over the chopped chocolate in a bowl and let it sit for a few minutes. Stir until smooth and add butter if desired. Allow it to cool until it thickens.
Step 6: Assemble the Macarons
Pair macaron shells of similar sizes, pipe the ganache onto one shell, and sandwich it with the other. Voilà! You have your homemade chocolate macarons!
Tips and Variations
- Color It Up: Add some gel food coloring to the batter for a fun twist!
- Flavor Infusions: Experiment with different fillings like raspberry, pistachio, or even salted caramel.
- Storage: Store macarons in an airtight container in the refrigerator for up to a week. They can also be frozen!
Final Thoughts
There you have it! The ultimate guide on how to make chocolate macarons. These delightful treats are not just a feast for the eyes but also a delicious indulgence. Try making them for your next gathering or simply to treat yourself. Trust me, once you master this recipe, you’ll be the star baker among your friends!
Try it and let us know how it turned out in the comments below! Happy baking!