
How to Ice a Cupcake: Your Ultimate Guide to Perfectly Decorated Treats
Are you ready to turn your plain cupcakes into stunning creations? Knowing how to ice a cupcake can elevate your baking game from ordinary to extraordinary! Whether you’re preparing for a birthday party, a family gathering, or just treating yourself, mastering cupcake icing is an essential skill for any dessert lover. This easy cupcake decorating tutorial will help you make beautiful treats that not only taste good but look gorgeous too!
A Sweet Story Behind Cupcake Icing
Cupcakes have become a staple in the dessert world for their versatility and charm. Traditionally served at birthdays and special occasions, cupcakes have evolved into gourmet delights served in coffee shops and bakeries all around the USA. The icing, however, is what truly takes these little cakes to the next level. It allows for creativity and personalization. Whether you’re aiming for a classic buttercream finish or experimenting with fondant, every cupcake tells a story of love and care. When you learn how to ice a cupcake, you’re also learning to express yourself in the sweetest way!
Ingredients
To create your own beautifully iced cupcakes, you’ll need a few basic ingredients:
Standard Vanilla Buttercream Icing:
- 2 sticks (1 cup) unsalted butter, softened
- 4 cups powdered sugar
- 1 tablespoon vanilla extract
- 2 tablespoons heavy cream or milk
- Food coloring (optional)
Equipment Needed:
- Piping bags with various nozzles
- Offset spatula or a butter knife
- Cupcake base (baked and cooled)
These ingredients will get you started with the best buttercream icing recipe, perfect for any occasion!
Instructions
Step 1: Prepare Your Cupcake Base
Start by baking your favorite cupcake recipe. Allow the cupcakes to cool completely before icing. This is crucial to prevent the icing from melting!
Step 2: Make the Buttercream Icing
In a mixing bowl:
- Beat the softened butter on high speed until creamy.
- Gradually add in the powdered sugar, starting on low to prevent a sugar cloud.
- Add the vanilla extract and the cream or milk. If desired, add food coloring to achieve your favorite shade.
- Mix until smooth and fluffy.
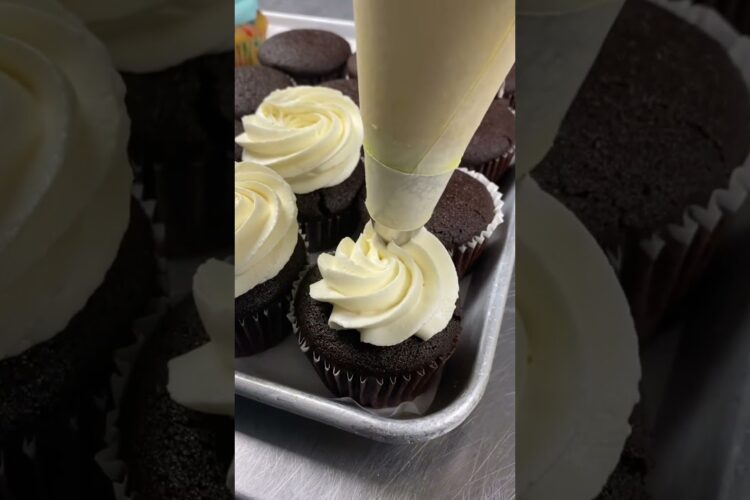
Step 3: Ice the Cupcakes
- Piping Technique: Fill your piping bag with icing and use a star or round tip nozzle. Hold the bag at a 90-degree angle to the cupcake, starting from the outer edge. Gently squeeze and pull inwards, creating a swirl.
- Spreading Technique: If you’re looking for a smooth finish, use an offset spatula to spread a generous amount of icing on top, smoothing the surface.
Step 4: Decorate!
Top your iced cupcakes with sprinkles, chocolate shavings, or fresh fruit to add a special touch. The possibilities are endless!
Tips & Variations
- Experiment with Flavors: Don’t stop at vanilla—try almond, lemon, or even cocoa powder for chocolate buttercream icing!
- Use Different Nozzles: Create various designs with different piping nozzles. For example, a round tip for simple dots and a star tip for beautiful rosettes.
- Gluten-Free Option: If you or your guests prefer gluten-free treats, simply use gluten-free flour for the cupcake batter and ensure your ingredients are certified gluten-free.
The icing on the cupcake should match the occasion—fun and whimsical for birthdays, sleek and elegant for weddings!
Closing Thoughts
Now that you know how to ice a cupcake like a pro, it’s time to whip up a batch and share your creativity with friends and family! Cupcake decorating is an art form—experiment, have fun, and don’t be afraid to make it your own.
Try it out and let us know how it turned out! Share your cupcake creations with us in the comments below or on social media. Happy baking!