
Your Ultimate Guide to Assembling and Decorating a Layer Cake
Creating a stunning layer cake might seem challenging, but with this detailed guide, you’ll master the art effortlessly! Whether you’re baking a 2-layer, 3-layer, or even a 4-layer cake, follow these straightforward steps to achieve a beautiful result.
Ingredients You’ll Need:
- Cake Layers:
- 2-4 layers of cooled cake (6-inch or 9-inch)
- Frosting:
- 4.5-6 cups (1080-1440g) of your favorite frosting (American buttercream or Swiss meringue buttercream recommended)
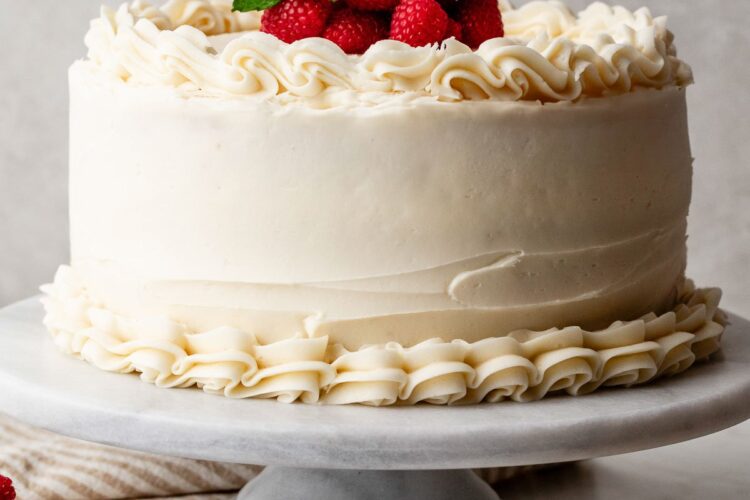
- Optional Garnishes:
- Fresh berries
- Mint leaves
- Wilton 1M piping tip (for decoration)
Preparation Steps:
Step 1: Leveling the Cake Layers
- Cool the Layers: Ensure your cake layers are completely cool.
- Level the Top: Use a serrated knife or a cake leveler to trim the dome from the tops of the cakes. This creates a flat surface for stacking.
- Save the Scraps: You can either discard the dome or crumble it for garnishing.
Step 2: Stacking the Layers
- Initial Setup: Place the first cake layer right side up on a cake turntable.
- Frosting Placement: Spread 3/4–1 cup (180–240g) of frosting evenly across the top using an offset spatula.
- Layering: Position the second cake layer upside down for a flat base.
- Repeat Frosting: Add another 3/4–1 cup (180–240g) of frost on top of the second layer.
- Final Layer:
- Add the top layer right side up or upside down based on your preferred aesthetic.
Step 3: Applying the Crumb Coat
- Thin Frosting Layer: Apply a thin layer of frosting all around the cake to trap any loose crumbs.
- Amount of Frosting: Use about 1 cup (240g) for a 3-layer cake or 3/4 cup (180g) for a 2-layer cake.
- Smoothing Technique: Utilize a bench scraper to smooth the sides.
- Chill the Cake: Refrigerate the cake for 20 minutes to 1 hour to set the crumb coat.
Step 4: Final Decoration
- Thicker Frosting: Once the crumb coat is set, add a thicker layer of frosting using a straight spatula.
- Texture Preference: You can choose between smooth sides or a textured finish.
- Transfer Carefully: If using a turntable, a cake lifter will help move it to a serving platter.
- Piping Details: Use a piping bag fitted with a Wilton 1M tip for decorative edges.
Step 5: Refrigerate Before Serving
- Chill for Freshness: Refrigerate the cake uncovered for at least 20 minutes but up to 4-6 hours for best results.
- Store Leftovers: Consider using a cake carrier to preserve freshness during transportation.
Helpful Tools for Cake Assembly
- Cake leveler
- Cake turntable
- Bench scraper
- Offset spatula
- Cake lifter
- Piping bags
Visual Instructions
For easier mastery, check out the accompanying video tutorial that demonstrates each step visually!
Final Touches
When it comes to decorating, simplicity can be just as beautiful. Fresh berries or delicate mint leaves can elevate your cake’s presentation without requiring advanced skills.
With this guide in hand, you’re ready to impress your friends and family with a stunning layer cake that tastes as good as it looks! Happy baking!