
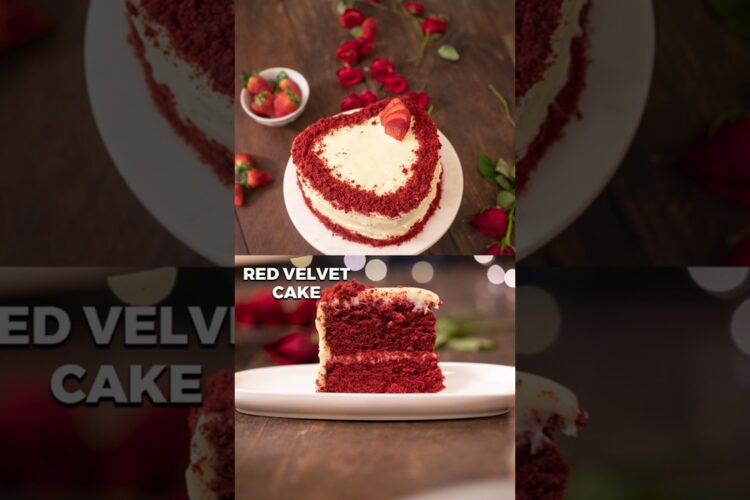
Indulge in Love: Easy Eggless Red Velvet Cake Recipe
Valentine’s Day is just around the corner, and what better way to celebrate than with a fabulous eggless red velvet cake? This cake not only looks stunning with its rich red hue and velvety texture but also boasts a delightful flavor that’ll steal anyone’s heart. Whether you’re hosting a romantic dinner or baking for a special someone, this easy recipe will make your Valentine’s Day extra special. Get ready to impress your loved ones with a dessert that’s as sweet as your affection!
The Love Story Behind Red Velvet Cake
Originating from the South, red velvet cake has a touch of history and a pinch of romance. It rose to popularity in the 1920s, and its vibrant color and luxurious taste have made it a favorite for celebrations ever since. One of the best things about this eggless red velvet cake recipe is that it’s perfect for those following a vegan diet or anyone with an egg allergy. You can serve this exquisite cake on special occasions, at birthday parties, or simply to treat yourself—no special reason required!
Ingredients for Eggless Red Velvet Cake
To whip up this delightful cake, you’ll need the following ingredients:
Cake Ingredients
- 2 cups all-purpose flour – The base of your cake, giving it structure.
- 1 cup powdered sugar – Sweetens the cake to perfection.
- 1 cup buttermilk – Adds moisture and tanginess.
- 1/2 cup vegetable oil – For a rich, moist texture.
- 2 tablespoons red food coloring – The star of the show for that beautiful color!
- 1 tablespoon cocoa powder – Gives a subtle chocolate flavor.
- 1 teaspoon baking soda – Helps your cake rise.
- 1 teaspoon white vinegar – Activates the baking soda.
- 1 teaspoon vanilla extract – Adds depth of flavor.
- Pinch of salt – Balances the sweetness.
Cream Cheese Frosting Ingredients
To elevate this cake further, don’t forget the frosting:
- 8 oz cream cheese, softened – The main component of your luscious frosting.
- 1/2 cup unsalted butter, softened – Adds rich flavor.
- 2 cups powdered sugar – For sweetness.
- 1 teaspoon vanilla extract – Enhances the taste of the frosting.
Instructions: How to Make Eggless Red Velvet Cake
Creating this exquisite eggless red velvet cake is a breeze. Follow these simple steps:
Step 1: Preheat the Oven
Preheat your oven to 350°F (175°C) and grease two 9-inch round cake pans. Line them with parchment paper for easy removal.
Step 2: Mix Dry Ingredients
In a large bowl, whisk together the flour, cocoa powder, baking soda, and salt. Set aside.
Step 3: Combine Wet Ingredients
In another bowl, combine the buttermilk, vegetable oil, red food coloring, vanilla extract, and vinegar. Mix well until smooth.
Step 4: Combine Mixtures
Gradually add the wet ingredients to the dry ingredients, mixing until just combined. Do not over-mix, as this can lead to a tough cake.
Step 5: Bake
Pour the batter equally into the prepared cake pans. Bake for 25-30 minutes, or until a toothpick inserted into the center comes out clean. Allow the cakes to cool in the pans for 10 minutes, then transfer to wire racks to cool completely.
Step 6: Prepare the Frosting
While the cakes cool, make the cream cheese frosting. In a mixing bowl, beat together the cream cheese and butter until creamy and smooth. Gradually add powdered sugar and vanilla extract, mixing well.
Step 7: Assemble the Cake
Once the cakes have cooled completely, spread a generous layer of cream cheese frosting on top of one layer and place the other layer on top. Frost the top and sides of the entire cake, creating a beautiful and inviting masterpiece.
Tips and Variations for Your Eggless Red Velvet Cake
- For added flavor: Mix in some chopped nuts or chocolate chips into the batter.
- Decorate: Top with fresh berries, edible flowers, or sprinkles for a festive touch.
- Store correctly: Keep your cake in an airtight container in the refrigerator for up to a week.
This easy eggless red velvet cake is bound to become a favorite in your household. So, gather your ingredients and get baking!
Are you ready to impress your friends and loved ones with this exquisite dessert? Try it, and let us know how it turned out! Happy baking!