
The Best Crème Brûlée Recipe: An Easy Dessert to Impress
Are you ready to dive into the world of French desserts? If you’re searching for an easy crème brûlée recipe that guarantees to wow your friends and family, you’re in the right place! This classic creamy custard topped with a perfectly caramelized sugar crust is not just a crowd-pleaser; it’s also a showstopper at any gathering. Whether you’re hosting a dinner party or simply indulging on a quiet evening, mastering this recipe will elevate your culinary repertoire.
A Little History About Crème Brûlée
Crème brûlée, which translates to “burnt cream,” has a rich history dating back to the 17th century. This indulgent dessert has become a beloved staple in both fine dining and home kitchens. It’s often served at special occasions like birthdays, anniversaries, and holidays, making it the perfect choice for creating unforgettable memories. Many chefs consider it a rite of passage to learn how to make crème brûlée, so why not start your journey today?
Ingredients
To create the best crème brûlée recipe, you’ll need just a handful of ingredients that blend together to create this silky dessert. Here’s what you’ll need:
- 2 cups heavy cream: The base of your crème brûlée, ensuring richness.
- 1 cup milk: For balance and creaminess.
- 1 cup granulated sugar: Sweetness that transforms into that delightful crust.
- 5 large egg yolks: These will give your custard its beautiful texture.
- 1 tablespoon vanilla extract: For that aromatic touch.
- Extra sugar: For caramelizing the top, usually 2 tablespoons.
Optional Ingredients:
- A pinch of salt: To enhance the sweetness.
- Flavored extracts or zest: Such as orange or almond for unique twists.
Instructions
How to Make Crème Brûlée
Follow these easy steps for homemade crème brûlée that will impress even the toughest food critics!
-
Preheat the Oven: Start by preheating your oven to 325°F (162°C).
-
Prepare the Cream Mixture: In a saucepan, combine the heavy cream and milk. Heat on medium until just simmering (do not let it boil). Remove from heat and stir in the vanilla extract.
-
Whisk the Eggs: In a mixing bowl, whisk together the egg yolks and sugar until they become pale and frothy.
-
Combine the Mixtures: Slowly pour the warm cream mixture into the egg mixture, whisking constantly to prevent the eggs from scrambling.
-
Strain the Custard: Pour the custard through a fine-mesh strainer into a large bowl or measuring cup to remove any lumps.
-
Fill Ramekins: Divide the custard mixture evenly into individual ramekins. Place them in a baking dish and fill the dish with hot water until it reaches halfway up the sides of the ramekins.
-
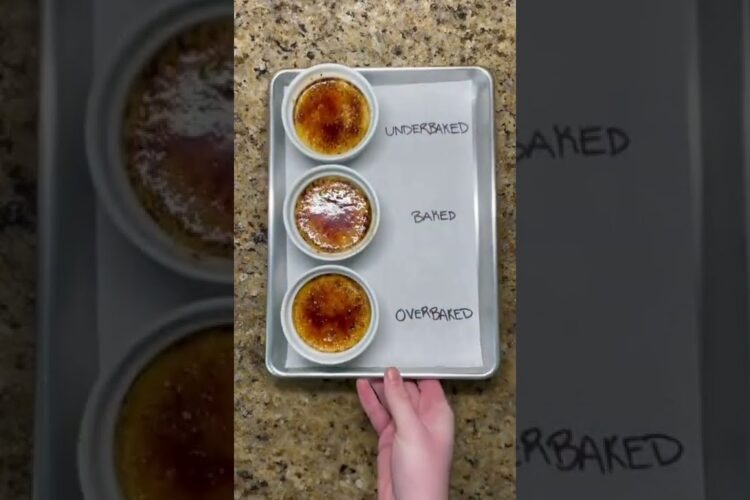
Bake: Bake for about 40-45 minutes, or until the custard is set but still slightly jiggly in the center.
-
Cool and Chill: Remove from the water bath and allow to cool. Once at room temperature, cover and refrigerate for at least 2 hours or overnight.
-
Caramelize the Top: Before serving, sprinkle a thin layer of sugar on top of each custard. Use a kitchen torch to caramelize the sugar until it forms a crispy layer. If you don’t have a torch, you can place the ramekins under a broiler for a minute, but watch closely!
-
Serve and Enjoy: Let the caramel layer harden for a minute, then serve and listen for that satisfying crack when your spoon hits the topping!
Tips and Variations
- Infuse Flavors: Try infusing your cream with lavender, mint, or citrus zest for a unique twist.
- Dairy-Free Version: Substitute the heavy cream and milk with coconut cream and almond milk for a dairy-free alternative.
- Storage: You can make the custard ahead of time and caramelize the sugar just before serving for the best texture.
Conclusion
Now that you know how to make this classic easy crème brûlée recipe, it’s time to get cooking! The creamy custard and crunchy caramel make for an unforgettable dessert experience. Don’t forget to share your culinary masterpiece with us—try it out, and let us know how it turned out! Happy baking!