
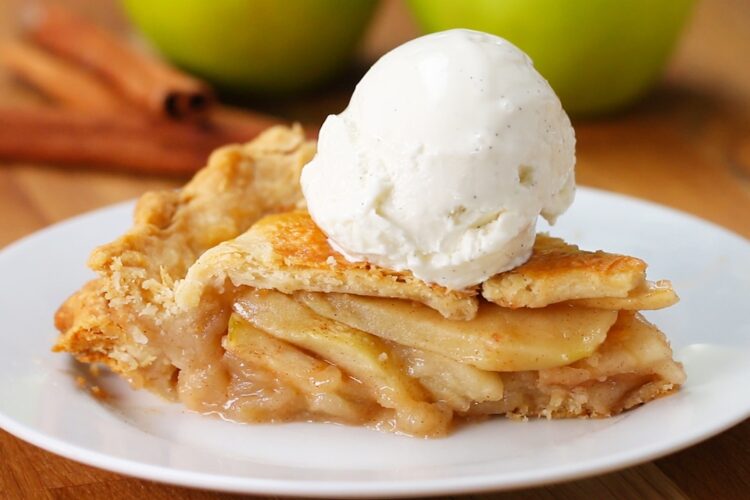
Homemade Apple Pie from Scratch: The Ultimate Comfort Dessert
There’s truly nothing quite like the smell of homemade apple pie wafting through your kitchen on a chilly afternoon. If you’re craving a classic dessert that embodies warmth and nostalgia, you’ve come to the right place! This easy apple pie from scratch recipe not only satisfies your sweet tooth but also fills your home with the delightful aroma of cinnamon and baked apples. Let’s dive into how to make the best apple pie you’ve ever tasted!
The Apple Pie Story: A Timeless Favorite
Apple pie isn’t just a dessert; it’s a beloved tradition in many American households. Often served during family gatherings, Thanksgiving, or cozy evenings in, this pie is a symbol of comfort and warmth. The origins of apple pie date back to the 14th century, and today, it’s still a favorite choice for those looking to celebrate life’s special moments. One of the best things about making your own apple pie from scratch is being able to customize it as you desire. So, let’s get started on creating this deliciously appealing dessert!
Ingredients
Creating the best apple pie starts with fresh and quality ingredients. Here’s what you’ll need for this easy apple pie recipe:
For the Pie Crust:
- 2 ½ cups all-purpose flour
- 1 cup unsalted butter, chilled and diced
- 1 teaspoon salt
- 1 teaspoon sugar
- 6 to 8 tablespoons ice water
For the Apple Filling:
- 6 to 8 medium apples (such as Granny Smith or Honeycrisp)
- ¾ cup sugar
- 2 tablespoons all-purpose flour
- 1 teaspoon ground cinnamon
- ¼ teaspoon ground nutmeg
- 1 tablespoon lemon juice
- 1 tablespoon butter (to dot on top)
For Finishing:
- 1 egg (beaten, for egg wash)
- Additional sugar for sprinkling
Instructions
Now that you have your ingredients ready, let’s jump into how to make this delightful apple pie from scratch.
Step 1: Make the Pie Crust
- In a large bowl, combine 2 ½ cups of flour, 1 teaspoon of salt, and 1 teaspoon of sugar.
- Cut in the diced butter until the mixture resembles coarse crumbs.
- Stir in the ice water, a tablespoon at a time, until the dough comes together.
- Divide the dough in half, shape into discs, and wrap in plastic. Refrigerate for at least 1 hour.
Step 2: Prepare the Apple Filling
- While the dough chills, peel, core, and slice your apples.
- In a large bowl, toss the apple slices with ¾ cup sugar, 2 tablespoons flour, cinnamon, nutmeg, and lemon juice. Let it sit for about 15 minutes.
Step 3: Assemble the Pie
- Preheat your oven to 425°F (220°C).
- Roll out one disc of dough on a floured surface until it fits your pie pan. Transfer it to the pan.
- Pour the apple filling into the crust and dot with small pieces of butter.
- Roll out the second disc of dough and place it over the filling. Seal edges by crimping with your fingers.
- Cut a few slits in the top crust to allow steam to escape. Brush the surface with the beaten egg and sprinkle with sugar.
Step 4: Bake
- Bake in the preheated oven for 15 minutes.
- Lower the temperature to 350°F (175°C) and continue baking for 30-40 minutes, until the apples are tender and the crust is golden brown.
Step 5: Cool and Serve
Allow your apple pie to cool on a wire rack for about 2 hours before slicing. Serve it warm with a scoop of vanilla ice cream for an unforgettable treat!
Tips and Variations
- Flavor Infusions: Experiment with different spices like cardamom or allspice to create unique flavor profiles.
- Different Apples: Mix different varieties of apples for added texture and flavor. Combining sweet and tart apples can elevate your pie.
- Crispier Crust: For extra flaky crust, consider using a food processor for cutting in the butter.
This homemade apple pie is a labor of love that highlights the simplicity and richness of natural ingredients. Whether it’s a special occasion or just a weekend treat, this recipe is sure to impress.
Call to Action
Are you ready to make your very own homemade apple pie from scratch? Try it and let us know how it turned out! We’d love to hear about your success and any special twists you added to make this classic dessert your own!