
How to Bake a Cake on a Charcoal Jiko: A Delicious Adventure!
Baking a cake without a traditional oven might seem challenging, but let me tell you—it’s an amazing adventure! Have you ever wondered how to bake a cake on a charcoal jiko? Let me guide you through this fascinating process with an easy tutorial that will make you a pro at home baking using creative methods. Perfect for gatherings or when you’re craving something sweet, this baking technique is not just practical, but it’s also a fantastic way to enjoy a rustic flavor. Let’s get started!
A Taste of Tradition
Baking on a charcoal jiko is a beloved practice in many cultures, especially where ovens aren’t the norm. This method infuses your cake with a unique smoky flavor that can’t be replicated in a conventional oven. Whether you’re roasting marshmallows over a fire or hosting a backyard BBQ, finding ways to impress your guests with unusual baking techniques can be a conversation starter! Plus, it’s a great way to cook outdoors, especially during those warm summer evenings.
Ingredients
To make an easy cake on a charcoal jiko, you’ll need a handful of basic ingredients:
Cake Ingredients
- 1 ½ cups all-purpose flour – The backbone of your cake.
- 1 cup granulated sugar – For sweetness and texture.
- ½ cup unsalted butter (softened) – Adds moisture and richness.
- 2 large eggs – For binding and fluffiness.
- 1 cup milk – Provides a fluffy texture.
- 2 teaspoons baking powder – The leavening agent for that perfect rise.
- 1 teaspoon vanilla extract – A flavor enhancer that makes all the difference.
- Pinch of salt – Balances all the sweet flavors.
Instructions
Now that we have our ingredients ready, it’s time to dive into the instructions for how to bake a cake on a charcoal jiko.
Step-by-Step Process
-
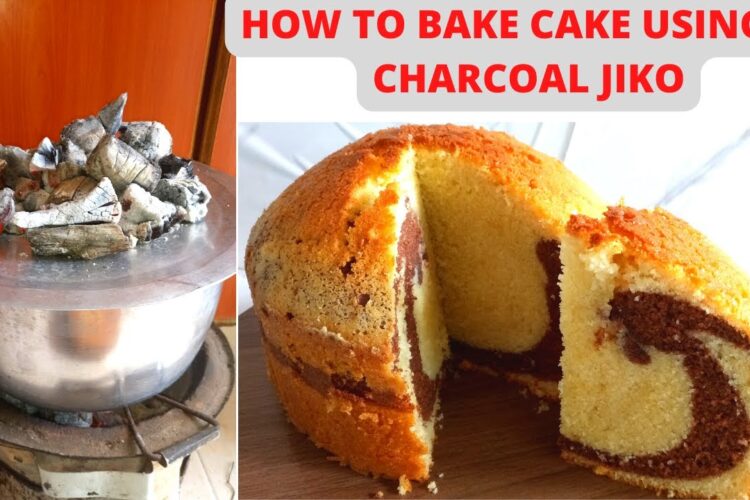
Prepare the Jiko: Start by arranging your charcoal briquettes in the jiko. Light them and let them burn until they’re covered with gray ash. You want a steady heat but not too hot, aiming for a temperature similar to a regular oven (around 350°F).
-
Mix the Batter: In a mixing bowl, cream together the softened butter and sugar until light and fluffy. Add the eggs one at a time, mixing well after each addition. Then, stir in the vanilla extract.
-
Combine Dry Ingredients: In a separate bowl, whisk together the flour, baking powder, and salt. Gradually add this mixture to the butter mixture, alternating with milk. Mix until smooth, making sure there are no lumps.
-
Prepare the Baking Pan: Grease your pan with butter or baking spray. You can use a round or square cake pan—whatever you have handy!
-
Pour and Smooth: Pour the batter into the prepared pan, smoothing the top with a spatula.
-
Bake Over Charcoal: Place a trivet or a layer of stones in the jiko to raise the cake pan above the coals. Cover the jiko with a lid or aluminum foil to trap the heat. Bake for about 30-40 minutes, checking occasionally. Use a toothpick to test for doneness; it should come out clean when the cake is ready.
-
Cool and Serve: Once baked, remove the cake from the jiko and let it cool on a wire rack. Once it’s cool, frost or enjoy as is!
Tips & Variations
-
Flavorful Add-Ins: You can customize your cake by adding ingredients like chocolate chips, nuts, or dried fruits.
-
Frosting Options: A simple buttercream or cream cheese frosting can elevate your cake. If you’re feeling adventurous, try coconut or lemon glaze for something different.
-
Coconut Charcoal Options: If you can find coconut charcoal, it burns longer and cleaner, giving your cake an even better flavor!
-
Experiment with Flavors: Don’t hesitate to switch up the vanilla extract for almond or citrus zest for a new twist!
Wrap Up
Baking a cake on a charcoal jiko might just become your new favorite hobby! The smoky flavor and unique method will surely impress your family and friends. So gather your ingredients, ignite that charcoal, and embark on this exciting baking journey!
Try it and let us know how it turned out! Whether you stick to the classic vanilla or experiment with creative twists, there’s a whole world of flavor waiting for you. Happy baking!