
The Ultimate Chapman’s Ice Cream Cake: A Delicious Delight for Any Occasion
When the weather gets warm or a special occasion rolls around, nothing beats the creamy, divine taste of ice cream cake. If you’re searching for a memorable dessert that will impress family and friends, look no further than The Ultimate Chapman’s Ice Cream Cake! This easy, no-bake recipe combines layers of rich chocolate, velvety vanilla ice cream, and a delightful crunch that will keep everyone coming back for seconds. Get ready to take your dessert game to the next level!
A Sweet Story Behind the Recipe
Chapman’s Ice Cream is a beloved brand known for its delicious and high-quality ice cream products. This ice cream cake celebrates those flavors, making it a popular choice at birthdays, summer barbecues, and dinner parties alike. The versatility of this easy recipe allows you to customize it to your liking, making it perfect for any occasion. So why not whip up this cake when you want to wow your guests or treat yourself?
Ingredients
To make The Ultimate Chapman’s Ice Cream Cake, gather the following ingredients:
Ice Cream Layers
- 2 containers (1.5 quart each) of Chapman’s Vanilla Ice Cream (softened)
- 2 containers (1.5 quart each) of Chapman’s Chocolate Ice Cream (softened)
Cake Layer
- 1 package of crushed chocolate cookies (about 24 cookies)
- ½ cup unsalted butter (melted)
Topping
- 1 cup whipped cream (store-bought or homemade)
- Chocolate or caramel sauce for drizzling (optional)
- Sprinkles or chocolate shavings for decoration
Instructions
Now that you have your ingredients ready, follow these simple steps to create the best ice cream cake!
Step 1: Prepare the Crust
- Combine Crust Ingredients: In a mixing bowl, combine the crushed chocolate cookies and melted butter. Mix well until the cookie crumbs are fully coated.
- Form the Base: Press the cookie mixture firmly into the bottom of a 9-inch springform pan. Make sure it’s evenly spread and compact to form a sturdy crust.
Step 2: Add Ice Cream Layers
- Layer Vanilla Ice Cream: Take one container of softened vanilla ice cream and spread it evenly over the crust. Smooth it out with a spatula.
- Freeze: Place the pan in the freezer for 30 minutes to set.
- Layer Chocolate Ice Cream: After the vanilla layer is firm, spread the softened chocolate ice cream over the vanilla layer.
- Freeze Again: Return the pan to the freezer for another 30 minutes.
Step 3: Final Layer
- Add Second Vanilla Layer: Once the chocolate layer is set, spread the second container of softened vanilla ice cream on top.
- Final Freeze: Freeze the cake for at least 4 hours or until completely set. For best results, freeze overnight.
Step 4: Serve
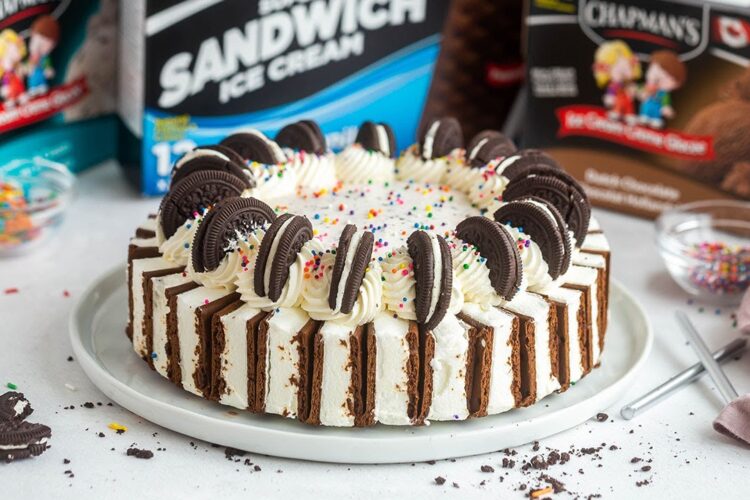
- Decorate: Before serving, top the cake with whipped cream, drizzle with chocolate or caramel sauce, and add your choice of sprinkles or chocolate shavings.
- Slice and Enjoy: Remove the outer ring of the springform pan and slice the cake into pieces.
Tips & Variations
- Mix and Match Flavors: Don’t hesitate to experiment with different ice cream flavors. Try swapping out the vanilla and chocolate for your favorite flavors like strawberry, mint chocolate chip, or cookies and cream for a unique twist.
- Add Fillings: Consider layering crushed candy bars, nuts, or fruit between the ice cream layers for an added crunch or flavor burst.
- No-Springform?: If you don’t have a springform pan, you can use a regular cake pan lined with parchment paper. Just be sure to let the cake sit out for a few minutes before slicing.
Conclusion
The Ultimate Chapman’s Ice Cream Cake is an indulgent dessert that’s as fun to make as it is to eat. This easy recipe is perfect for family gatherings, summer parties, or simply a sweet treat for yourself. Don’t wait too long – get your ingredients together and start assembling this delightful cake today!
Try it and let us know how it turned out! Share your experience, and don’t forget to tag us on social media with your creations. Happy baking!