
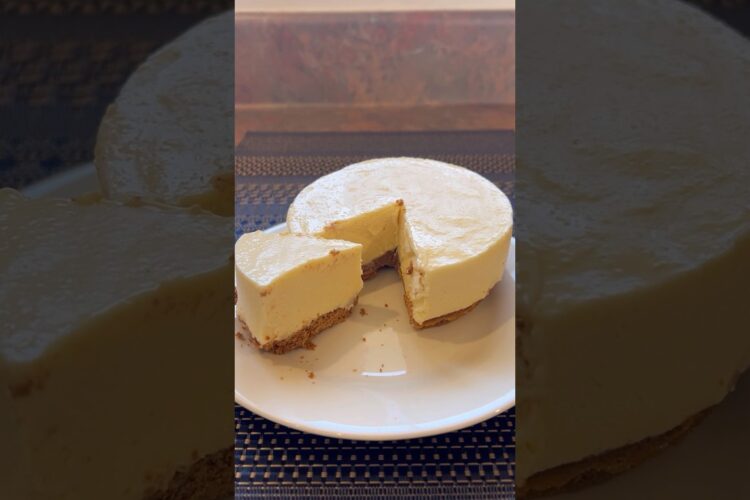
Creamy Vanilla Cheesecake No Bake Recipe: The Ultimate Dessert You Can’t Resist
Are you craving a rich, creamy dessert that’s simple to whip up? Look no further! This Creamy Vanilla Cheesecake No Bake recipe will be your new go-to treat for any occasion. Whether you’re hosting a summer barbecue, throwing a birthday bash, or simply indulging your sweet tooth, this no-bake cheesecake is destined to impress!
Why You’ll Love This No Bake Cheesecake
Imagine this: a hot summer day, friends gathered around, and the perfect dessert to cool things down. This no-bake vanilla cheesecake not only satisfies your sweet cravings but also comes together with minimal effort. It’s creamy, luscious, and delicately flavored with vanilla, making it a classic favorite among dessert lovers. Plus, no oven means no sweating in the kitchen—even in the midst of summer heat!
Ingredients
To craft this incredible no bake cheesecake, you’ll need the following ingredients:
For the Crust:
- 1 ½ cups graham cracker crumbs
- ½ cup unsalted butter, melted
- ¼ cup granulated sugar
For the Filling:
- 16 oz (two 8 oz packages) cream cheese, softened
- 1 cup powdered sugar
- 1 teaspoon vanilla extract
- 1 cup heavy whipping cream
Optional Toppings:
- Fresh whipped cream
- Seasonal berries (like strawberries or blueberries)
- Chocolate shavings or a drizzle of chocolate sauce
Instructions
Making this easy no bake cheesecake is a breeze! Follow these simple steps:
Step 1: Prepare the Crust
- Combine Ingredients: In a mixing bowl, combine graham cracker crumbs, melted butter, and granulated sugar. Stir until all crumbs are coated.
- Form the Base: Press the crumb mixture firmly into the bottom of a 9-inch springform pan. Ensure it’s evenly distributed to form a sturdy crust.
- Chill: Place the crust in the refrigerator while you prepare the filling for added firmness.
Step 2: Make the Filling
- Mix Cream Cheese: In a large bowl, beat the softened cream cheese until smooth and creamy. You can use a handheld mixer or a stand mixer for this—just ensure there are no lumps!
- Add Sugar and Vanilla: Gradually mix in powdered sugar and vanilla extract until well combined and smooth.
- Whip the Cream: In a separate bowl, beat the heavy whipping cream until stiff peaks form. This adds a fluffy texture to the filling.
- Combine: Gently fold the whipped cream into the cream cheese mixture. Be careful not to deflate the whipped cream—this keeps your cheesecake light and airy.
Step 3: Assemble the Cheesecake
- Fill the Crust: Pour the creamy filling into the chilled crust, smoothing the top with a spatula.
- Chill: Cover and refrigerate for at least 4-6 hours, or overnight for the best results. This allows the cheesecake to set and develop its flavors.
Step 4: Serve
- Add Toppings: Before serving, garnish with optional toppings like whipped cream, fresh berries, or chocolate shavings.
- Slice and Enjoy: Carefully remove the cheesecake from the springform pan, slice it up, and serve to your eager guests!
Tips and Variations
- Flavor Variations: Want to mix it up? Add lemon zest for a refreshing twist or fold in crushed cookies for added texture.
- Dairy-Free Option: Substitute cream cheese with a dairy-free alternative and use coconut cream for the whipping cream for a vegan-friendly treat.
- Make Ahead: This cheesecake is perfect for prepping a day in advance—simply store it in the refrigerator until you’re ready to serve.
Final Thoughts
This Creamy Vanilla Cheesecake No Bake recipe is not only effortless but is sure to become a beloved dessert staple in your home. With its luscious texture and delightful flavor, it’s the perfect ending to any meal. What are you waiting for? Gather your ingredients and give this easy no bake cheesecake a try!
Let us know how it turned out—leave a comment below, and share your delicious creations with us! Happy baking (or should we say, chilling)!