
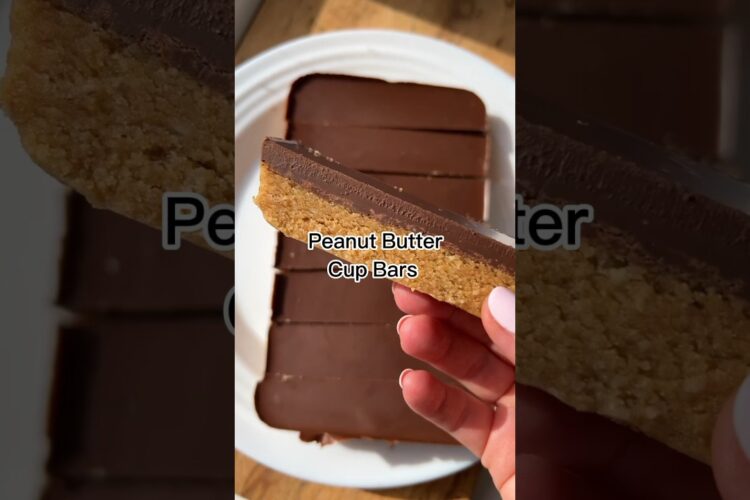
Irresistible Peanut Butter Cup Bars: Your Go-To Easy Recipe!
Craving a delicious yet healthy snack that you can whip up in no time? Look no further! These Peanut Butter Cup Bars are the perfect solution. Not only are they an easy recipe that requires no baking, but they also pack a punch of flavor that will satisfy your sweet tooth without the guilt. So let’s dive into how to make these delectable bars that will have your friends and family begging for seconds!
Why Peanut Butter Cup Bars Are a Must-Try
These no-bake peanut butter cup bars are not just a treat; they’re an experience! Originating from the love of classic peanut butter cups, this recipe is a clever twist that combines simplicity and flavor. Whether you’re hosting a summer picnic, looking for a quick after-school snack, or satisfying your late-night cravings, these bars are versatile and delicious. Plus, they store well in the fridge, making them a go-to option for meal prep!
Ingredients
Before we dive into the instructions, let’s gather everything you’ll need to recreate this best snack recipe:
For the Base:
- 1 cup graham cracker crumbs
- 1 cup rolled oats
- 1/2 cup honey or maple syrup (for a vegan option)
- 1 cup creamy peanut butter (make sure it’s natural!)
- 1/2 cup chocolate chips (dark or milk, depending on your preference)
For the Chocolate Topping:
- 1 cup semi-sweet chocolate chips
- 2 tablespoons coconut oil (this helps to give the chocolate a nice sheen)
Instructions
Now that you have all your ingredients ready, let’s get started on how to make these amazing peanut butter cup bars!
Step 1: Create the Base
- In a large mixing bowl, combine the graham cracker crumbs and rolled oats. Mix them well.
- Pour in the honey (or maple syrup) and creamy peanut butter. Mix until everything is well combined and has a sticky consistency. You can use a spatula or your hands for this part—it can get a little messy, but it’s worth it!
- Stir in the chocolate chips for an extra layer of deliciousness.
Step 2: Shape and Refrigerate
- Line an 8×8-inch baking dish with parchment paper. Press the peanut butter mixture firmly into the dish, creating an even layer. You want it to be compact!
- Cover the dish and place it in the refrigerator for at least 30 minutes. This allows the bars to set and makes cutting them easier.
Step 3: Prepare the Chocolate Topping
- Once the base has firmed up, melt the semi-sweet chocolate chips and coconut oil together. You can do this in a microwave-safe bowl, melting in 30-second intervals, stirring until smooth.
- Pour the melted chocolate over the chilled peanut butter base, spreading it evenly with a spatula.
Step 4: Final Chill
- Return the dish to the refrigerator for another 30 minutes or until the chocolate has hardened.
Step 5: Cut and Serve
- Once everything is set, remove the bars from the dish using the parchment paper. Cut them into squares or rectangles, and they’re ready to be devoured!
Tips and Variations
- Add-Ins: Feel free to customize your bars! You can include mini marshmallows, dried fruits, or even crushed nuts for added texture.
- Nut Butters: While peanut butter is the star of the show, you can switch it up with almond butter or sunflower seed butter for a nut-free version.
- Storage: Store your bars in an airtight container in the fridge for up to two weeks—if they last that long!
Final Thoughts
These Peanut Butter Cup Bars are not just an easy recipe; they’re a delightful way to indulge in a healthy snack. We’d love for you to try this easy, no-bake recipe and share it with your friends and family! They’re sure to be a hit at any gathering.
So what are you waiting for? Try it and let us know how it turned out! Happy snacking!